
Outdoor stairs have a knack for collecting grime, algae, and muck, turning your lovely walkway into a slippery eyesore.
But don’t worry, a good pressure wash can work magic. With the right gear and a little prep, it’s oddly satisfying. Here’s how to go about it, without fuss and with a touch of finesse.
Understanding What You’re Working With
Before switching anything on, it’s wise to give your stairs a proper look. Check for loose steps, cracks, or shaky handrails, as these can worsen under pressure.
These sorts of problems are easy to miss until something goes wrong, so it’s worth catching them early.
Take note of any damage, and if it helps, take a few photos. That way, you’ve got something to compare against later and can be sure nothing’s deteriorated after the wash.
Next comes choosing the right pressure washer. Electric models are great for everyday domestic use. They’re lighter, quieter, and easier to manage, making them perfect for wooden steps or those made from softer materials.
If you’re dealing with concrete, stone or deeply embedded dirt, a petrol washer might be better. These pack more of a punch, but need careful handling to avoid surface damage.
Don’t forget the nozzle, either. A 15- or 25-degree spray tip is usually your safest bet. It provides enough force to clean thoroughly without risking harm to the surface.
Anything narrower can cause splintering or etching, particularly on timber!
If you don’t have a washer at home, renting one makes a lot of sense. Most tool hire shops carry a range of models, so you can test a few and find what suits your needs. It’s more cost-effective and saves you having to store bulky equipment.
Getting the Space and Equipment Ready
Once you’ve sorted your tools, turn your attention to the surrounding area. Clear any plant pots, outdoor furniture or decorative items from the steps and the nearby ground. This gives you room to move and prevents anything from getting splashed or knocked over.
Cover anything delicate that can’t be moved—plants, windows, painted surfaces—with tarpaulin or protective sheeting. It can feel like overkill, but it’ll save you a mess later.
If the stairs are near a public pathway or communal space, it’s a good idea to place a sign nearby. People tend to get curious, and you don’t want someone slipping mid-job.
And while we’re on the subject of safety, make sure you’re dressed for it. Gloves, sturdy shoes and protective goggles will go a long way in keeping you safe from wayward spray or debris.
You might feel daft putting them on for a simple clean, but you won’t regret it when gravel starts flying about.
Choosing the Best Cleaning Approach
Using the right cleaning product makes a big difference. While water alone can rinse off loose grime, it won’t do much against moss, mildew or set-in dirt.
For those tougher jobs, use a cleaner designed for outdoor surfaces. If mould is a problem, one containing sodium hypochlorite is often effective. Just be sure to check the label and follow the usage instructions carefully.
If you’re conscious of the environment or just prefer to keep things mild, there are plenty of biodegradable options now on the market. These are usually pet-safe and plant-friendly, which is a welcome bonus for gardens.
For a homemade option, mix one cup of baking soda with roughly two litres of white vinegar. It bubbles up nicely and is gentle enough for regular use while still lifting dirt. It’s a sensible go-to for wooden stairs or surfaces where you’d rather not use chemicals.
Whatever method you choose, always test it on a small section first to make sure it doesn’t stain or discolour the surface.
Cleaning the Stairs Step by Step
Start by applying your chosen cleaning solution. Use a brush or spray attachment to distribute it evenly across each step, including corners and edges.
Give it about 10 to 15 minutes to break down dirt properly. Avoid letting it dry out completely, especially on sunny days—work in sections if you need to.
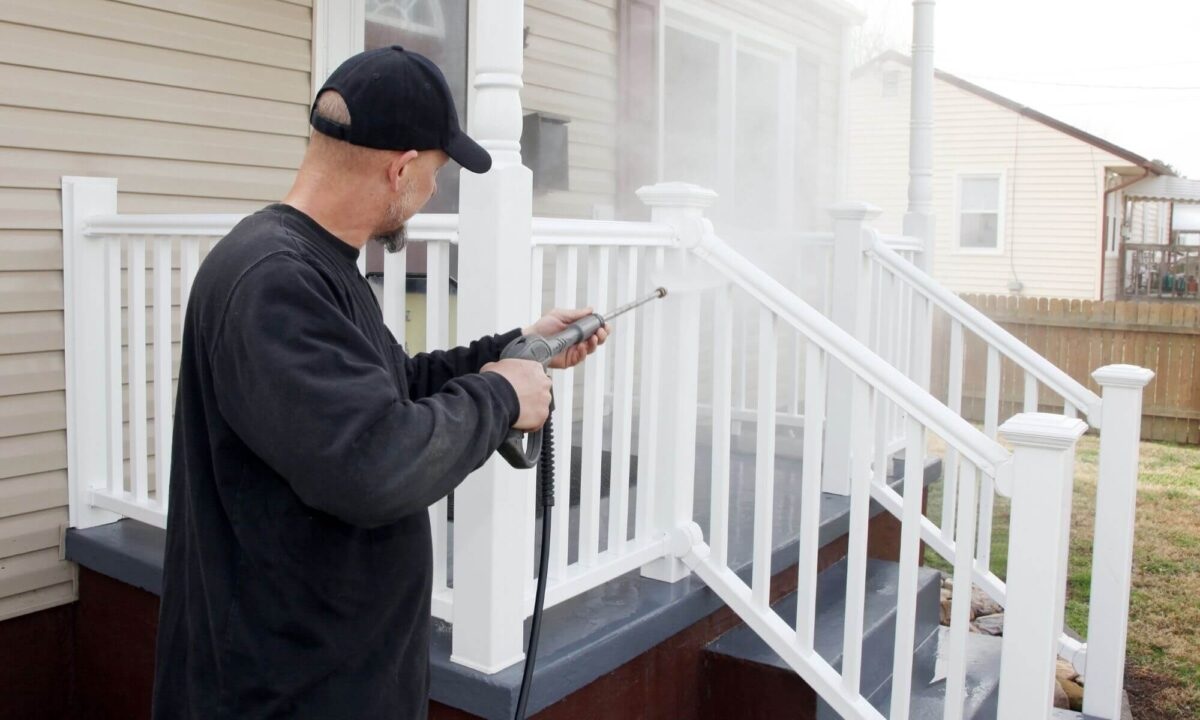
When you’re ready to rinse, hold the pressure washer at around 45 centimetres from the surface. Start at the top and move steadily down, keeping the nozzle in constant motion. This helps avoid patchy spots or gouging.
Try not to walk back over the cleaned steps until they’ve had a rinse, as footprints can leave marks. Once you’ve washed the lot, go over them with plain water to clear away any lingering cleaner.
This step matters more than you think, as residue can be slippery once dry.
Caring for Your Stairs After Washing
Once the stairs have had a proper rinse, leave them to dry fully before letting anyone walk on them. Damp steps remain a slipping hazard, and the last thing you want after a clean-up is a fall.
When dry, have a second look. You’ll notice areas you missed or marks that didn’t lift. These can often be sorted with a quick scrub using a soft brush and mild soap.
For long-term protection, consider sealing the surface. Stone, concrete and wood all benefit from sealants, which form barriers against dirt and moisture. This makes the next clean easier and helps preserve the material beneath.
You might also consider installing anti-slip strips if the stairs are especially exposed or used by older residents. They’re inexpensive, easy to fit, and help prevent nasty surprises in wet weather.
Avoiding Common Mistakes and Knowing When to Ask for Help
Overdoing it is the most common mistake people make.
Cranking up the pressure and blasting away might seem efficient, but it can easily damage the surface, especially on soft or ageing materials. So, stick with moderate settings and let the cleaning solution do the heavy lifting.
Another frequent misstep is skipping the prep. Not wearing protective gear, neglecting to cover plants, or spraying too closely can all lead to unnecessary problems. Likewise, cleaning on a windy day only ends in frustration. The spray goes everywhere but where it should.
If the stairs are particularly large, covered in years of grime, or part of a raised structure, you might be better off hiring a professional.
Companies that specialise in pressure cleaning stairs have the right equipment and expertise to carry out the job safely and effectively.
This approach is especially useful for properties with multiple access points, steep stairways, or surfaces made from unusual materials.
Keeping Your Stairs Looking Their Best
Maintaining clean outdoor stairs is easier than it sounds, and doesn’t need to become another tiresome chore.
A weekly sweep with a stiff brush clears off loose dirt, leaves, and general debris before they get to settle.
If you notice stains forming in between major cleans, tackle them with mild soap and water, rather than waiting for them to set in. For moss and algae, a vinegar solution works well on the odd patch.
Pay particular attention to shaded areas or steps near plants, where moisture tends to linger. These spots are more prone to mould, so regular checks can help prevent issues before they start.
It’s also worth planning major cleans during the quieter months. Early spring or late autumn are ideal—less foot traffic, better rates from cleaning services, and time to prepare for the weather ahead.
With a bit of consistency and a touch of care, your stairs will not only stay tidy but last longer too.
Conclusion
Cleaning outdoor stairs isn’t that glamorous, but the results are instantly rewarding. With the right tools and a little prep, pressure washing quickly refreshes your entrance and keeps things safe.
Treat it as routine care to avoid bigger issues down the line—or call in a pro if needed. Thanks for sticking around to the end!


Comments